Here is just one way to modify your existing rain bench to make the cap itself collect rainwater and put it inside your bench….
RainBench Retrofit:
Collect water that falls on your rain bench, too.
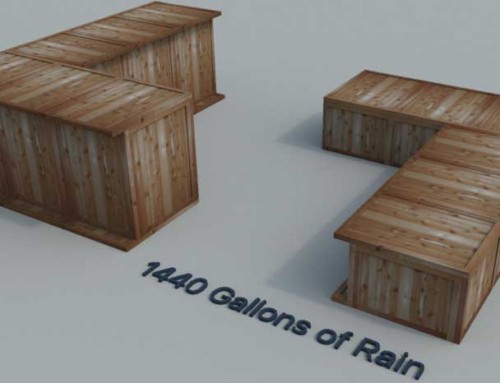
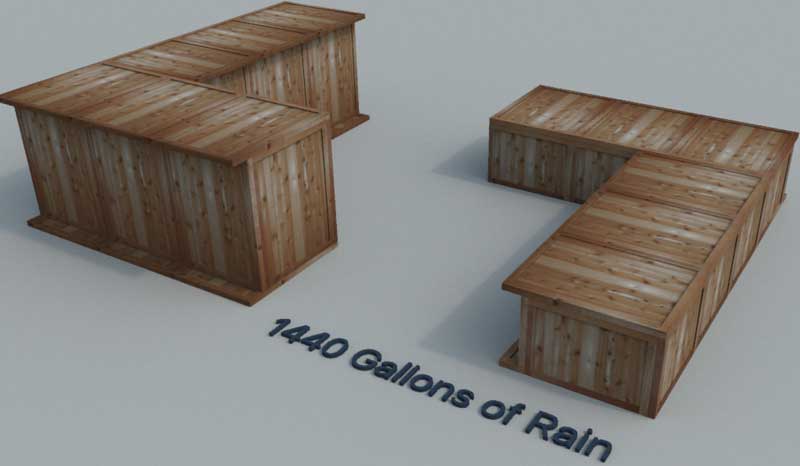
*This retrofit is for standard 65 gallon Rain Bench made with 1 DIY kit, 1 sheet of plywood and some 2x2s…
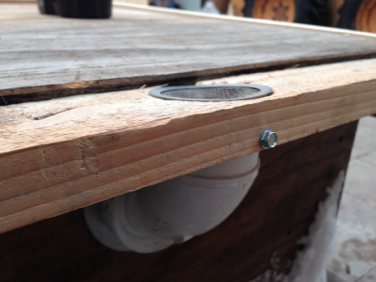
1. First, pick up a 1 1/2″ street elbow like this.. ($1.80 at Home Depot)
 2. Insert the large end into the 2 inch top threaded fitting of your liner
3. Pick up a couple of 8’ pieces of 1×3 furring strips ($1.07 ea at Home Depot), although 1×4 or 2x4s would work too. I just used some pieces of scrap lumber I had laying around the shop.
4. Cut two pieces at 28 inches long and two pieces at 40 inches
 (The angles shown are because that’s what one end of the scrap lumber was like already, and I’m just lazy 🙂
(I used an old rain bench because it was handy and the new retrofit shows better — ok that’s really more justification for active laziness…)
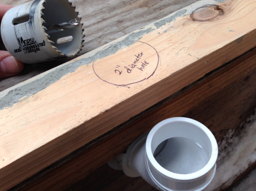 5. Drill a 2″ hole in th
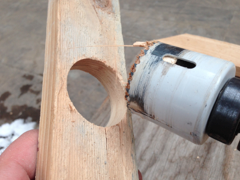 e center of one of the 28″ pieces
(2″ hole saw: $7.49 at Home Depot)
(nope, I am not paid by Home Depot)
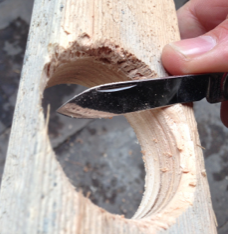
6. Shave the top side around the 2″ opening at an angle so that a filter will sit down into it. Or get a smaller filter (Again, I used a filter I had here from a self watering planter)
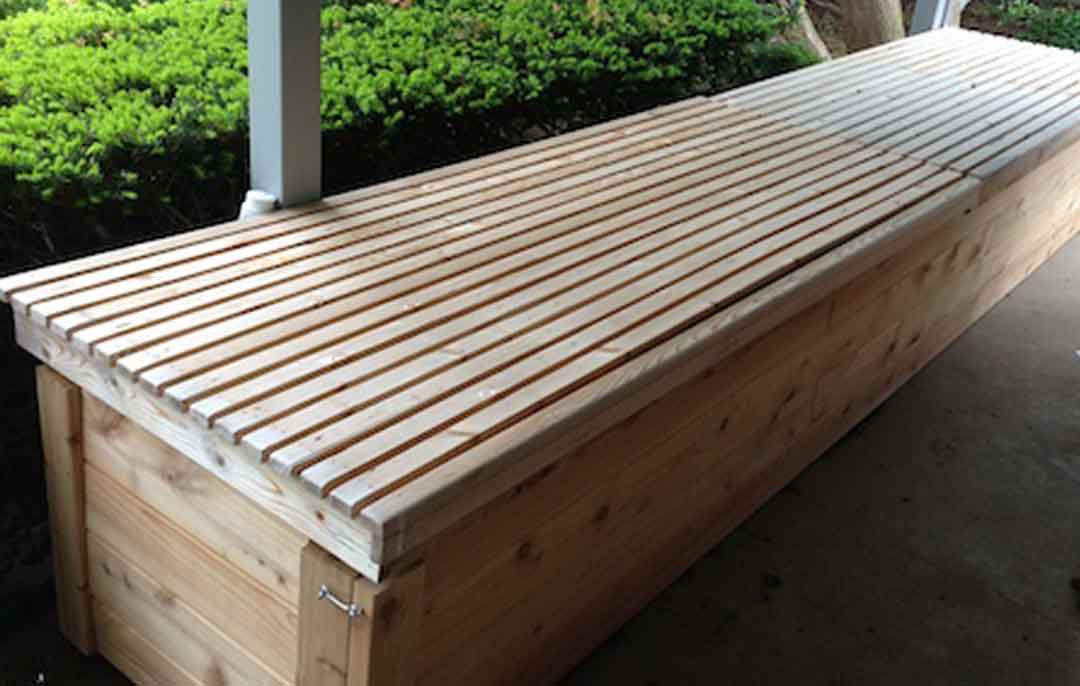
7. Fasten the solid pieces around the perimeter of the cap so the tops are just above the surface of the existing cap, catching the water that falls on it. Predrill all holes.
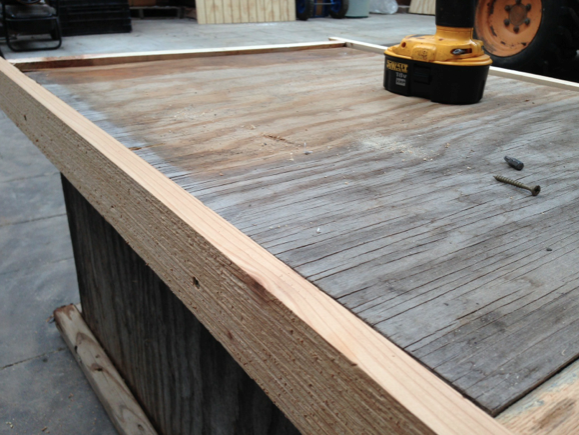
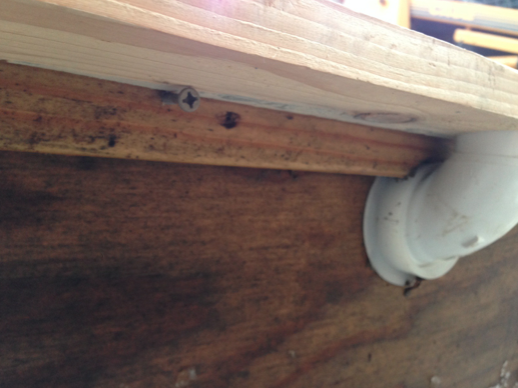
8. Fasten the piece with the hole horizontally so that it fits over the end of the 1 1/2″ street elbow, and place a small kitchen sink strainer in the opening.
Angle this horizontal board slightly back toward the bench, so water backs up and flows into the bench rather than right over the edge.
You can toenail or just support that board like I did below.
9. Now just sand it and seal the joints (use paintable sealant) and put a few coats of paint on it.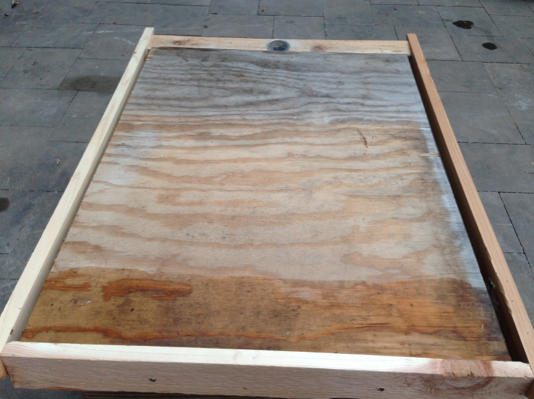
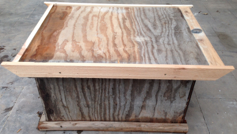
Here is what it will look like if you do not paint it. Pretty crappy. If you build your rain bench with wood, throw a few coats on the inside and out, and make it last. (Waterproofer for inside for wood benches: $16.97 at Home Depot)
A T-111 bench will channel water better than the flat plywood shown here, or you can add some 1×2 furri ng strips to the top. But remember: stuff collects in grooves so make sure they are removable or otherwise easy to clean.
*Avoid soggy bottoms: it’s a good idea to raise one end of the cap up slightly so water doesn’t sit on the bench.
Have fun, and let me know how it goes!
Cheers,
Scott


I want to capture the water that my portable air conditioner creates. Currently a days worth is about a gallon that goes down the drain, very inconvenient to keep empting it (who knew So Cal had humidity!) I will have to use a small copper pipe that I will drain outside. If I use adaptors to make it into a larger pipe, can I use your Rain Bench DIY kit for this project?