standing in the rain with your mouth open
is one way to drink rainwater. Catching and filtering it is another…
…first a disclaimer: I am no licensed plumber. He ran for the hills when we tried to hire him, so this is what I figured out on my own. I am not saying this is the best way, just what I did.
Drinking rainwater can make you pretty sick if you do it wrong, so do your homework…
Of course, groundwater can have all kinds of stuff in it, too, especially with groundwater drawdown. That was the case here: the well water was brown, so they wanted the supply to run through the same filters. Normally you would tie in the main supply after the rainwater is filtered, as in the RMS schematic below.

(source: rainwatermanagement.com)
Either way, filter and drink at your own risk.
Let’s start with the fun part, plumbing code!
A google search will get you excellent info from tamu.edu, TCEQ, CDC and other reputable sources. Just be sure to check with your local plumbing code regarding rainwater integration. If they aren’t any, and you can’t get a licensed plumber to do the job, which is what happened to us, the best we could do was exceed the current closest standards. (We also had a licensed plumber check over this setup, and approved.)
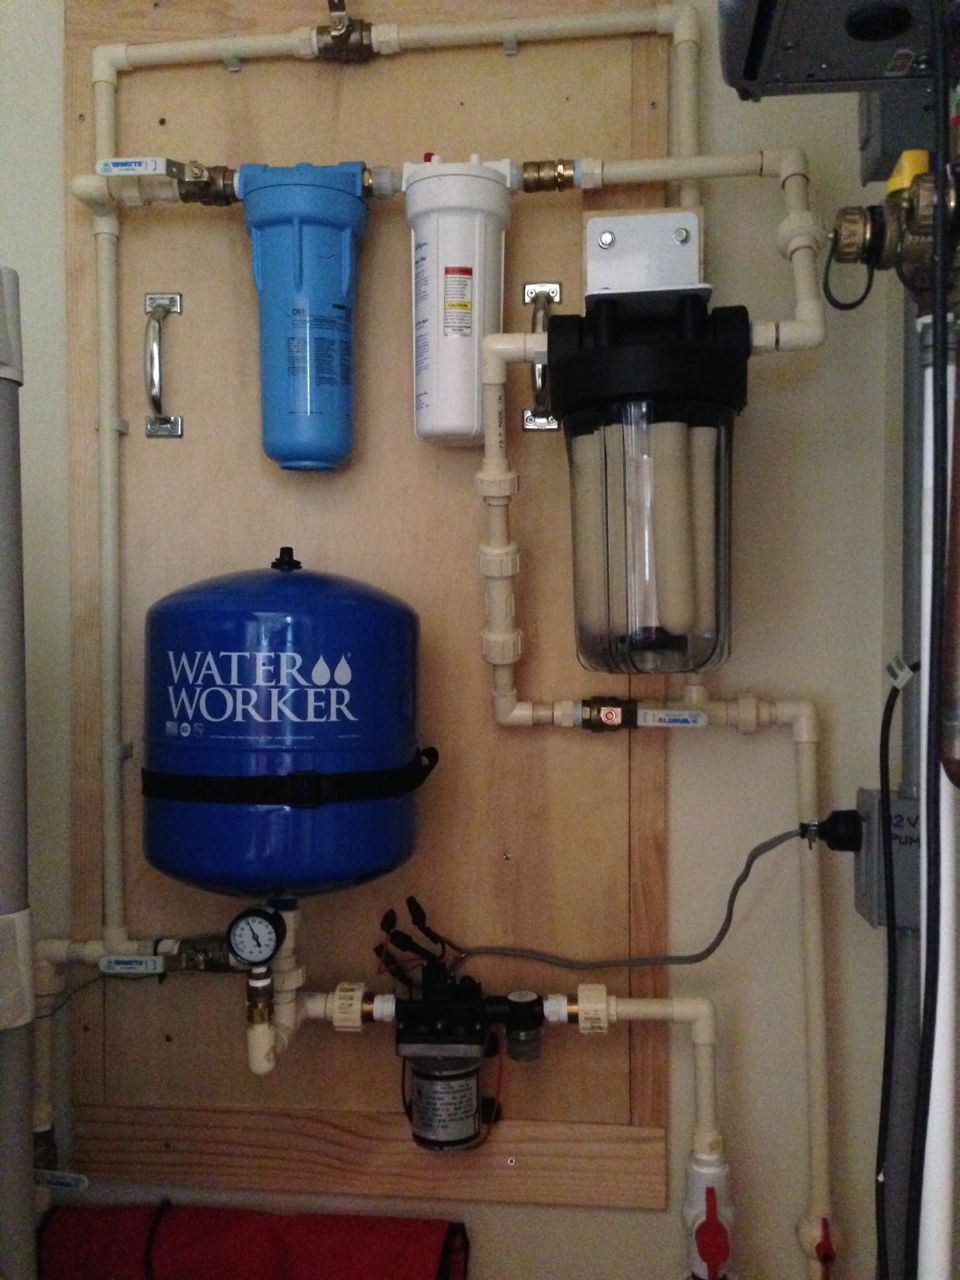
For potable plumbing, choices were copper, pex or CPVC. I used CPVC here.
I worked with CPVC before, had not yet worked with pex. (Since then, I converted the main lines under this cabin to pex and retrofitted my basement to heat my house with solar hot water, but that’s another post!)
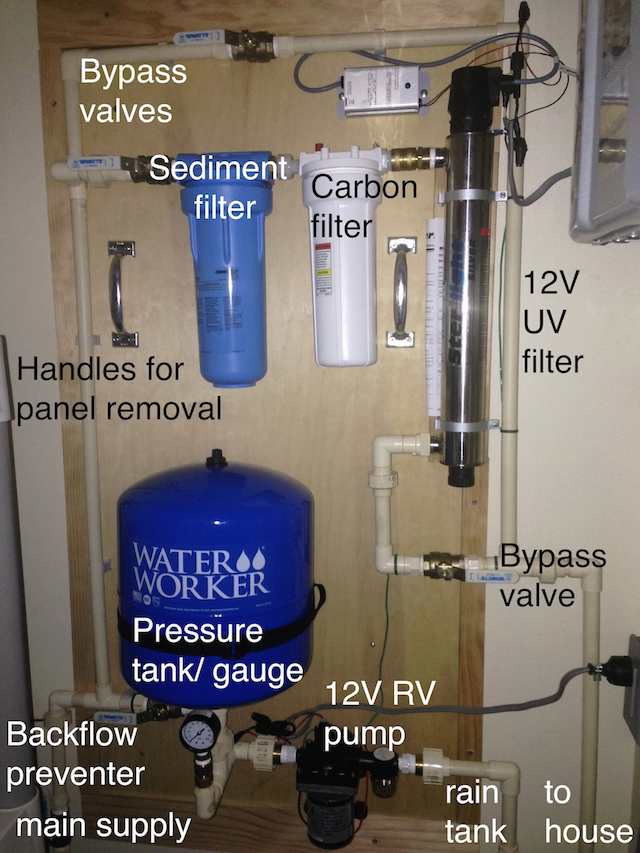
Also notice the unions, and the handles mounted on the board. This is to have the option of removal since this cabin is not used in winter and the filter panel could then be easily removed and used in another location.
 Originally I was going to buy a Water Organizing Module (W.O.M.) from earthship.com, because they know what they are doing.
Problem was:
- the size (I had a very small space to work with),
- the price (about $3,000) and
- it uses all regular PVC, or at least it looks like it.

I have a ton of respect for them, and I based this overall layout on this. Why? They use rainwater 4 times before letting it go down the drain. Get Mike’s book “Water from the Sky” and prepare to have your mind blown.
Oh yeah, rainwater harvesting just might be illegal where you live. If so, I didn’t see anything 😉 And we may have a storage solution for you.
More codes are being written and accepted for bringing rainwater into your home, because it’s kind of stupid not to. Besides the volumes of blah blah technical (but very important) data, a couple main requirements are: 1. a back flow preventer and 2. an air gap.
“…Although there are other ways to meet the requirement, most designs will:
- use a filter (usually a cartridge or membrane filter) that is capable of removing at least 99 percent of the particles that are 3.0 microns or larger in diameter;
- include a disinfection system (such as chlorine, ozone, or ultraviolet light) that is capable of inactivating (or killing) at least 99.99 percent of the viruses that might be present in the untreated water; and
- be large enough to treat an adequate quantity of water to meet your customers’ maximum daily demands at any time of the year.”- (from Texas Commission on Environmental Quality RG-445, Rainwater as Public Water Supply)
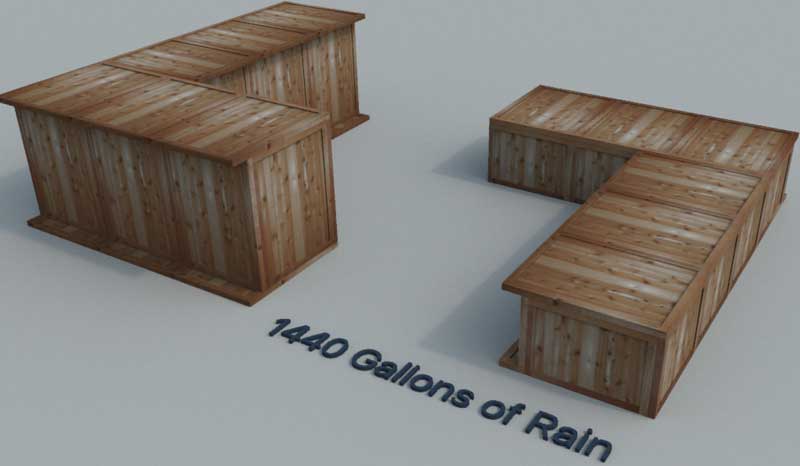
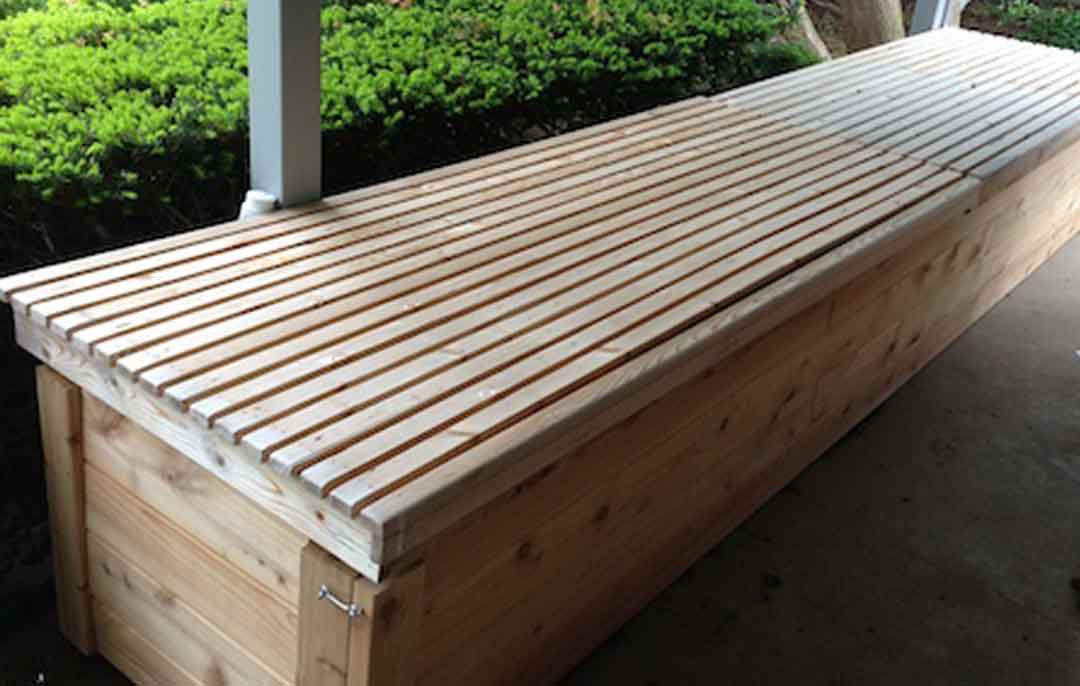
Whether you collect rainwater in rain benches, rain barrels, IBC totes or a garden shed, reducing runoff is only half the benefit. The fun part is using it.
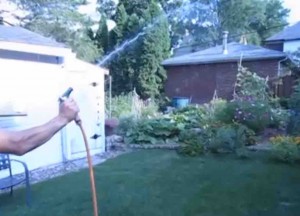
Pressurized unfiltered rainwater shooting all over
Most rainwater can be simply used for irrigation. Luckily, plants don’t care. They might even appreciate any added “fertilizer” in it.
The Perfect Water Filter
1. Roof and Gutters
In a perfect world, you have the ideal roof for harvesting rain: metal.
If you live in a perfect world, well congratulations! You get to happily skip on down to #2.

The last thing you want to sip on after a hard day’s work is a tall glass of hot asphalt tea.
 Take heart, there’s still hope.
If you ever saw “The Garbage Warrior,” you know Mike Reynolds. I asked Mike at a seminar, “What’s a guy to do with a shingle roof?” He said, “Coat it with acrylic.” So that’s what we did.
- You roll it on with a long paint roller and pans. (I am in no way affiliated with it, just used it that’s all)
- It isn’t cheap, but it coats your shingles and keeps a large majority of those little crumbs and chemicals from running right straight into your drinking water, or on your veggie garden for that matter.
- I found some for $27/gallon at a local hardware store, and here is a better deal (works out to $20/gallon) for a similar product: (disclaimer: I might make $0.37 or so if anyone buys this, but that’s only if I did it right…) Anvil ROOF-TEC Acrylic White Elastomeric Roof Coating 5 Gallon
 A gutter guard and a diverter with a filter
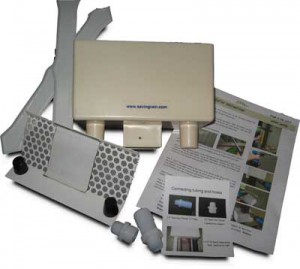 would both be good moves to keep that incoming water as clean as possible as long as those filters are cleaned periodically. Even the self-cleaning ones should be checked. (ok I am totally affiliated with this lady who came up with the Saving Rain diverter. She’s my mom. She is also the greatest, and she’s legally blind from a condition called Blepharospasm. Help her out here!) diverter cost about $40
2. First Flush Filter
This is basically a leaky tank; it takes out the worst of the runoff, that first 10 or 20 gallons of rain that washes all the crap off your roof or gutters. After it fills with swill, the clean(er) rainwater you want to keep is then redirected into the water storage device of your choice.

I used a series of 3 first flush filters, 1 from a kit (cost about $30) and 2 homemade using PVC, for this project.
After the rain is done, the first flush slowly “leaks” out and is ready to take the “first flush” out of the next rain.
3. Settling Tank for Irrigation
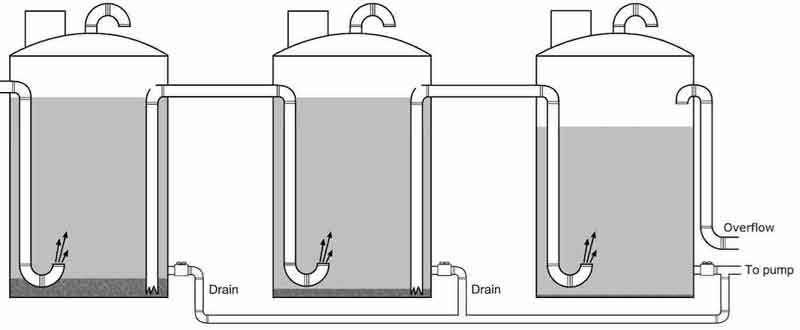
 Important notes on the above graphic: The incoming water comes in at the bottom, not falling in which would stir up all the sediment on the bottom every time it rains.
4. Drinking Rainwater Tank
 Food grade (FDA approved material), either glass (ideal, but not likely), stainless steel, fiberglass, coated concrete or plastic lined (most economical).
- Not allow any sunlight to reach the water, as this will grow algae.
- Disinfect it with a bleach solution periodically, for elimination or maintenance
- Completely sealed so not to allow insects or pests to reach the water reservoir
5. Final stage Drinking Filters and Pumps

courtesy of rainwater management services
A simple option is a gravity filter (see #6 next), but I needed to tie it into the supply because the well water is pretty unreliable.
The filters are pretty important to get right, so I leaned more toward over-filtering than under, with either a UV filter (if you use a pump for pressure and have ample power supply for the UV light), or a Doulton ceramic filter. If you can use both, go for it. Better safe than sorry!

I have used both types on different projects, and I like the Doulton Rio 2000 6 candle ceramic – with a clear standard housing so you can see when it needs to be cleaned. You can clean the candles over and over, which is nice. Just be careful. They will shatter if you drop them.

I used this housing, too– I like to use clear so we can see when it needs cleaning): http://amzn.to/2keM6vv
And don’t forget to get the mounting bracket (not included) and bolts or screws to mount the filter to the bracket and bracket to the wall! (yes, I had to get some)


**Update: this filter panel was actually updated to switch the UV filter out with a ceramic filter, so no more draining the battery bank running the UV light!** see pic below…

NOTE: I have since replaced some of the CPVC with flexible tubing per the pump manufacturer – so everything doesn’t pick up its good vibrations..
Also, if you are off grid and using a UV filter, do this:
And come on, you’re living off grid and you have filtered, pressurized, free drinking water. It’s not so bad to flip a switch.

The second is a Shurflo ‘Revolution’ pump, 12v – this is a standard RV pump and the one that I used on the island. (You can hear it running in the video above)
I haven’t had any problems other someone busted the pre-filter off with the threads so I had to replace it, but the price is right. Link to this pump on Amazon:Shurflo Revolution Standard 12v Automatic Demand Pump Classic RV Pump 4008-101-E65
I also added this small prefilter, not included with the pump:
SHURFLO (255-313) 1/2″ Twist-On Pipe Strainer
Here is that flexible tubing I mentioned above, sold as a “silencing” kit, but basically just to stop the pump from shake rattle and rolling the whole panel apart:
SHURFLO 94-591-01 Pump Silencing Kit
One final note on disinfection and the recommendation of adding chlorine to maintain safe drinking, straight from TCEQ:
- Ultraviolet light (UV) is extremely effective against Cryptosporidium, but high doses are required to inactivate some viral pathogens. In addition, UV systems do not maintain a disinfectant residual in your plumbing system.
- Free chlorine is very effective against viruses but is virtually ineffective against Cryptosporidium. In addition, it is easy to maintain and measure a free chlorine residual in your plumbing system.
So if you want your rainwater to taste like city water supply, and more importantly to wipe out any viruses, here is a link to an LSU law site for adding chlorine to purify water:http://biotech.law.lsu.edu/cphl/practice/water.htm
That’s pretty much it, now don’t waste it, i.e. try not to water your lawn or plants with drinking water, or flushing the toilet for that matter.
…Sure, unless Scruffy drinks from the toilet on a regular basis, but Scruffy also drinks from mud puddles. Even running wash water through a sand, gravel, or planted biofilter will clean it up immensely. But that’s another post…
What if it doesn’t rain?
Drink A/C condensate and make a solar still! And for Pete’s sake stop watering plants with drinking water. Use your wash water (grey water) instead – but that’s another topic…
For now, Google “Laundry to Landscape” and follow Art’s plans. Genius. Simple.
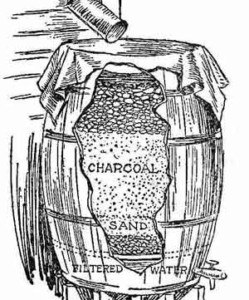 6. And for simple DIY Drinking Water How-To… Look No Further
Straight out of one of the oldest homesteading books out there, this slow sand filter design is the basis of many commercial filters available now, and goes back to recreating nature, or at least trying..
There are many great how-to posts out there for simple filters, some using a cut off plastic bottle. Remember, generally the more filter media the better, and the time factor of developing the natural beneficial bacteria layer is important. Again you are trying to recreate the natural filtration of the ground, where the top layer with plants and living microorganisms (establish over time) greatly purify water as it filters down into the groundwater. For an in depth look at this biological filtration layer: http://www.biosandfilter.org/biosandfilter/index.php/item/320
 Along those lines, there is an even simpler way to disinfect water for drinking called the SODIS (“solar disinfection”) method.
It has been scientifically proven that if you sit a clear bottle of water in the sun for 6 hours, it’ll be drinkable.
Check it out here: http://www.sodis.ch/methode/index_EN
So… there’s my 6 cents!
Happy Rainwater Harvesting!
Peace, Love, Irrigation…
(Editor’s note: This has been updated and added to the original post from April 16, 2015, in order to provide more complete information. Hope it helps!)


Your UV filter is plumbed backwards. The inlet should be at the bottom and the outlet at the top. Less turbulence and flow is more controlled. Check the manufacturer’s instructions and you will see that I am right.
Thanks, Jack! The instructions are actually at the location of the filter, and we are removing this anyway, adding a ceramic filter. The UV light drains too much power when on continuously. Do you have a solution for automatic operation, so it only turns on when water is flowing but shuts off when flow stops? We were thinking possibly a pressure switch like the pump, but the time water is flowing before the pump kicks on would also then be before the UV light turns on, so not consistent… Appreciate the feedback!
i worry with that type of filter sestym, you will need either a pre-filter reservoir or a pump to push the water? though that much media so it can keep up with the amount of rainwater coming in. Under normal circumstances pool filters are fed by very powerful pumps (3-5hp)
The pump shown and used on this panel, a 12v with an automatic pressure switch, seems to keep up very well pulling water from the tank, through the filters shown and giving full flow to faucets and shower, although I have not tested it with multiple faucets open. I’m sure pressure would be reduced then. To be clear, this particular application is on an off-grid cabin on an island, and the rainwater being used has already been collected by 2 diverters, 3 first flush filters and stored in a 600 gallon tank.
This set up is a potential disaster and a health hazard. Even if this would pass local plumbing codes, which I highly doubt(I am certain in most of the continental US you are not allowed to connect a non-potable water source to a potable especially a city supply) there are several huge no-nos here. 1. The unfiltered rain water shares the same pipe as the freshwater on the left most vertical pipe. Say you ran rain water through that with contaminates, then switched back to fresh water. That section of pipe is no longer clean. 2. Having a pump before the filter is asking for trouble. 3. The way these valves are set up and this is plumbed in, you could easily accidentally open the rainwater to be pumped by force back into the fresh water side. There is no failsafe and people make mistakes. Any spot that could allow rainwater back into the freshwater side would have to at the minimum have a spring check valve and should have a backflow preventer. The only way I would even attempt to do this (and I wouldn’t) would be to have the rainwater and fresh water systems/piping connect to the main lnlet to the house via a 3-way ball valve so that it is impossible to have an open loop from one system into another. What I would do if I were in the island situation is have the freshwater source pumped into the rainwater tank with an appropriate air gap. That 100% eliminates the possibility of contamination and reduces all the valves and piping by more than half. The drawback is, you would have to set up a float valve or something similar to automatically keep the tanks full while not wasting water by overflowing them. Sorry if I don’t have the full context but am just going off what is on this page. I happened across this picture(second from top) on Pinterest and wanted to make sure anyone who was thinking of doing this got a professional engineer’s advice first.
Good call, Daniel. Thanks for the well thought out comment. You may not have noticed the backflow preventer you suggested is labeled on the bottom left of the photo above, and it’s not very visible (the lighting is very bad in this room). Agreed, this is certainly not a professional plumbing advice page – also tried to clarify in the first sentence – but although we could not get a licensed plumber to even take on this job, I was able to get one to come out and look at this setup after I completed it. He approved of everything other than the few pieces of regular PVC on the supply sides that should be CPVC like the rest of the filter panel. Also important to note: the private well here is in terrible shape, officials wanted to condemn it and the water coming out of the ground is horrid, so we weren’t too concerned about rain contaminating that. They needed a filter setup either way. I will likely update this post and fill in more details for all’s safety and information sake, and thanks again for commenting!
Also regarding your note on plumbing codes, this is from the City of Portland, Oregon Code Guide:
4. Cisterns. The following are the minimum requirements for cisterns in the City:
a. General.
1) All cisterns shall be listed for use with potable water.
2) Cisterns shall be capable of being filled from both the rainwater
harvesting system and the municipal water system. The municipal system shall be protected from cross contamination by the following:
a) A reduced pressure backflow assembly listed on the
Approved Backflow Prevention Assembly List published by the Oregon Health Division (OHD); and
ICC – RES/34/#1 & UPC/6/#2
Rainwater Harvesting Systems for Interior Use or Combined Interior & Exterior Use Page 7 of 16
March 13, 2001
b) An air gap.
Backflow assemblies shall be maintained and tested yearly. The test results shall be provided to the Water Bureau.
So you were right about the air gap, good on you.. A link to that doc: http://www.portlandonline.com/shared/cfm/image.cfm?id=68627
(pages 6-7)